Set up your customized integration
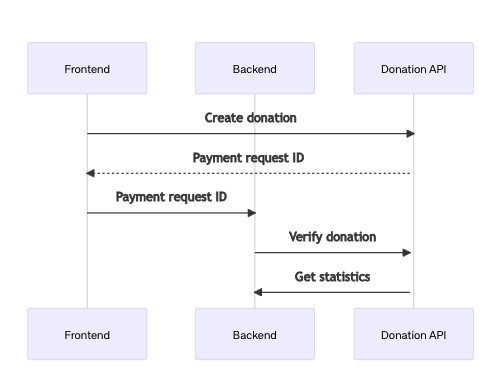
To create a donation, you can use our donation REST API. The API allows you to create donations (payment requests) either on behalf of your customers or as corporate donations and then retrieve statistics for the donations made.
This is an overview of how things tie together:
Create a Milkywire integration
Creating a new integration
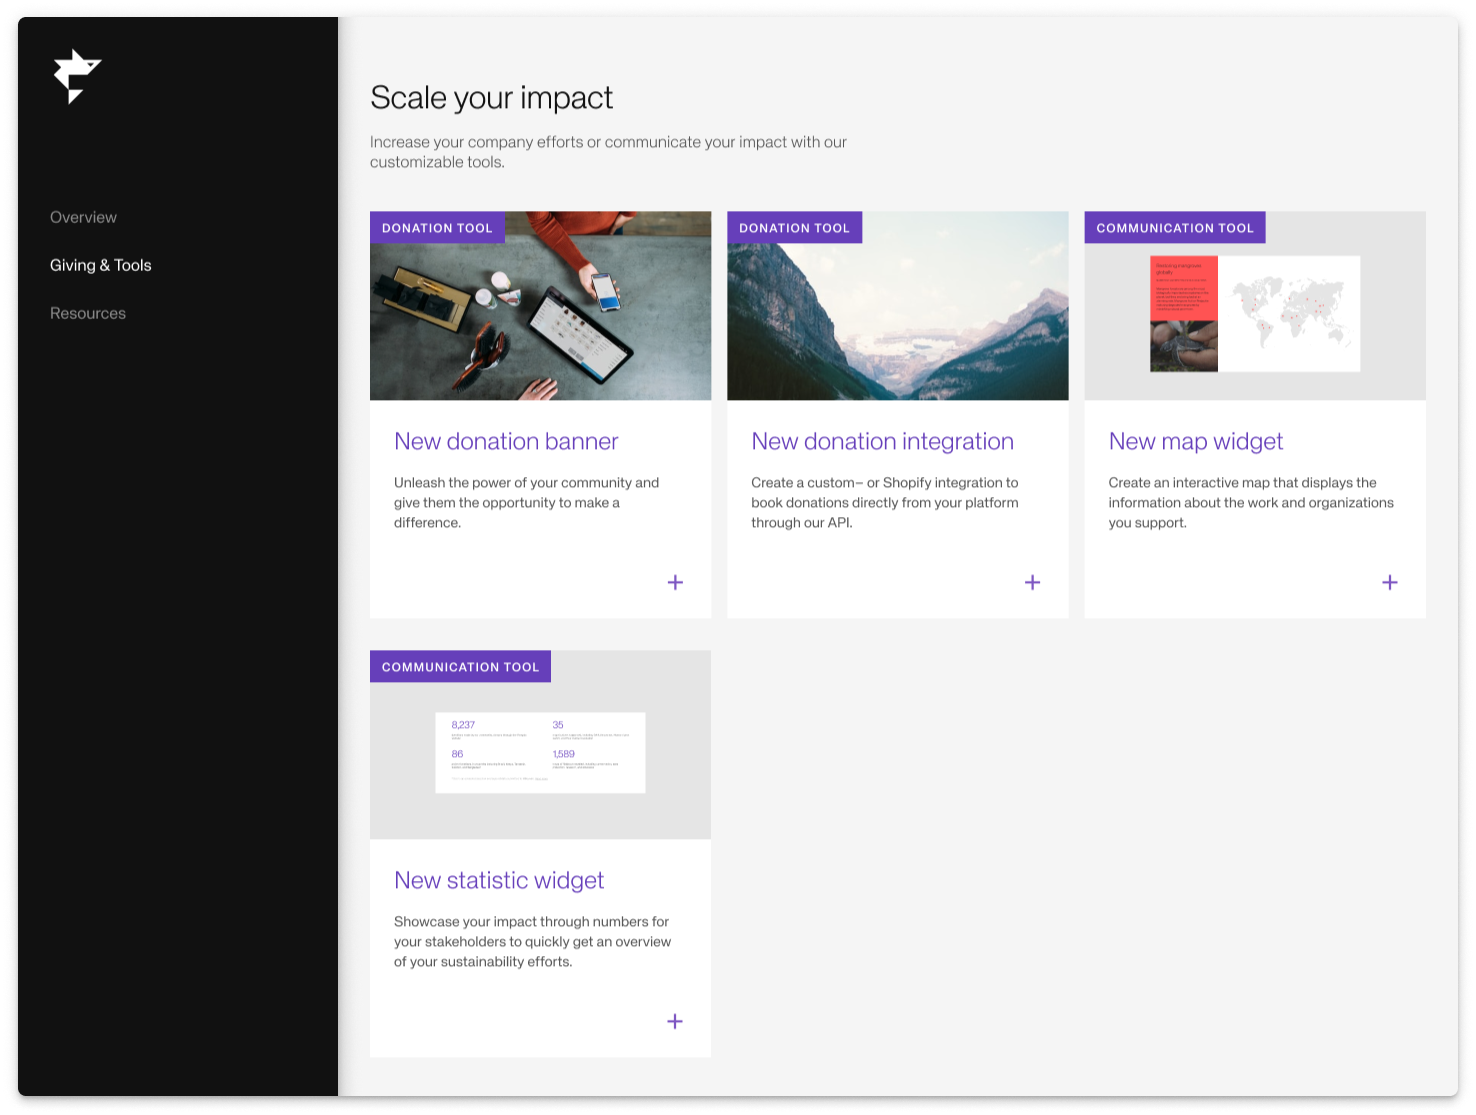
Once logged in to the Partner Portal, navigate to Giving & tools and scroll down to the Scale your impact section. Click on New donation integration button, to create a new integration.
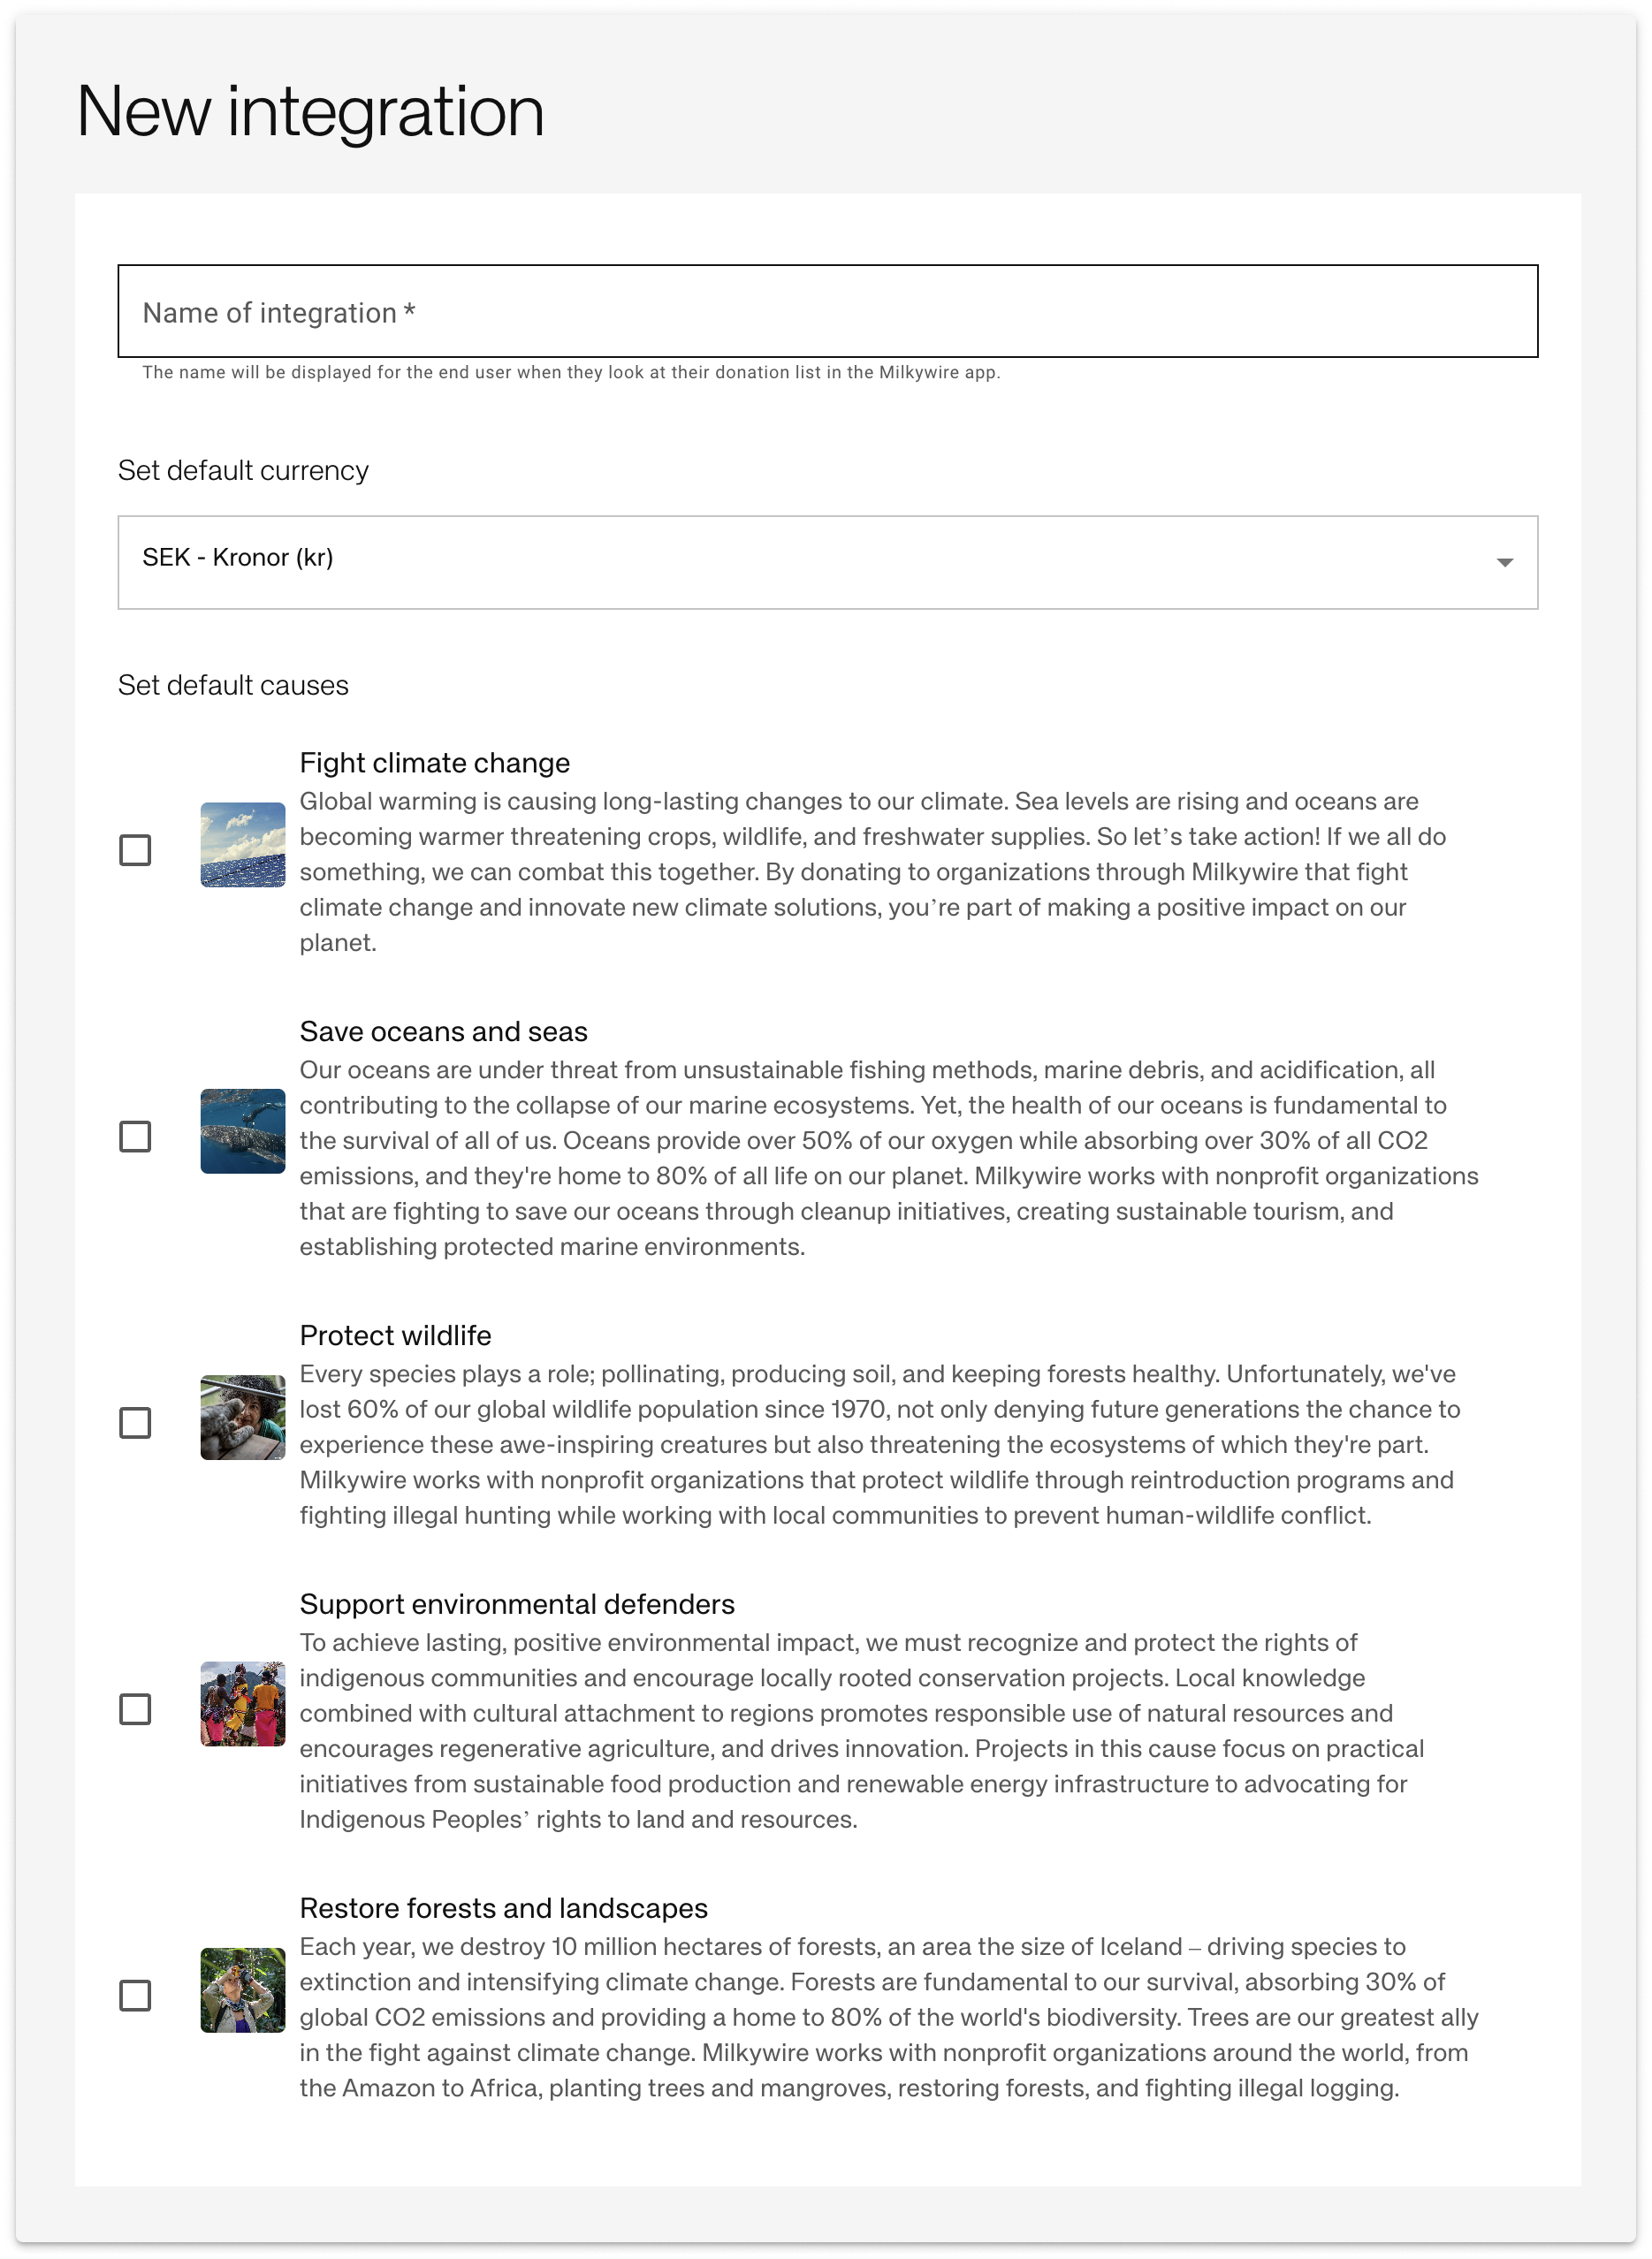
Set defaults
- Set up your integrations based on your preferences.
- Name your integration*
- Set a default currency and default cause(s)
You can choose one or up to five different causes: Fight climate change, Save oceans and seas, Protect wildlife, Support environmental defenders and Restore forests and landscapes.
When done just click the Create button at the bottom right.
- The name will be displayed for the end user when they look at their donation list in the Milkywire app.
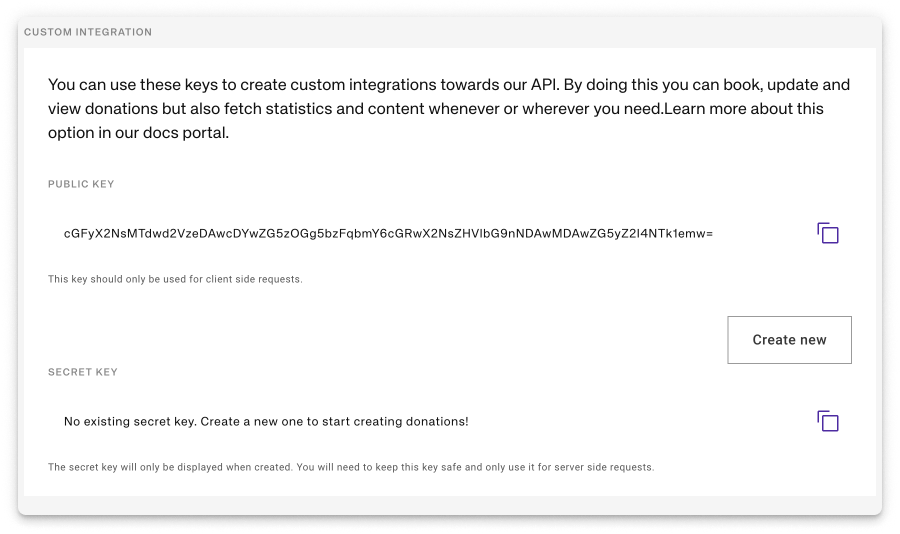
Create API keys
After the integration is created, you will need to generate a secret key to create donations. We will generate a public key for you automatically that you can use for making client-side requests to our donation API.
Create a secret key for your integration by clicking Create new and store the returned key somewhere safe. You should only use the secret key in your backend requests since it has access to all partner API endpoints. Note that we will only display the secret key once it is created. If you lose the key, you will need to replace your existing one.
Make sure to store the returned key somewhere safe. You should only use the secret key in your backend requests since it has access to all partner API endpoints.
Note that we will only display the secret key once it is created. If you lose the key, you will need to replace your existing one.
Create a donation
Each donation is created by providing a donation amount and currency code via a POST request to /payment-requests. In the response, you will receive a payment request ID that you must pass in when validating the donation in the next step.
Use the partnerReferences property to add donation references to the donations. You can pass in an reference ID, a timestamp or a user ID that you want to connect to a specific donation. These will be visible in the partner portal and in the payment instructions.
Donations are automatically distributed to the causes that you defined in the partner portal. You can override the default selection by passing in a causeIds array in the payload with the cause IDs that you want to support in the specific donation.
The POST request can be made with your public key on the client side. Each created donation needs to be verified by the PUT request below to be a part of your donation payment instruction later on.
const response = await fetch("https://api.milkywire.com/partners/v2/payment-requests", {
  method: "POST",
  headers: {
    'Content-Type': 'application/json'
    'x-api-key': '<public key>'
  },
  body: {
    customerDetails: {  // Optional
      firstName: 'Mr',
      lastName: 'Bean'
      email: 'mr@bean.com',
    }
    partnerReference: {  // Optional
      id: '<unique id>',
      timestamp: '2022-09-14',
      userId: '123',
    }
    amount: 700,
    currencyCode: 'SEK',
    causeIds: ['some-cause-id'] // Optional cause override
  }
});

const { id } = await response.json();
You can read more about the request in the API documentation.
Verify the donation
Since the endpoint for creating donations is publicly available, you will need to verify the payment request. To do this, you will need your secret key and the payment request-id that you received in the response of the POST request when creating the payment request.
const response = await fetch(
  "https://api.milkywire.com/partners/v2/payment-requests/:payment-request-id",
  {
    method: "PUT",
    headers: {
      authorization: "Bearer <secret key>",
      "Content-Type": "application/json",
    },
    body: {
      status: "SUCCEEDED",
    },
  }
);
You can read more about the request in the API documentation.
Cancel a donation
If you want to cancel your donation you will need your secret key and the payment request-id that you received in the response of the POST request when creating the payment request. You can cancel a donation as long as it is not yet paid. You do so by passing in the status VOID.
const response = await fetch(
  "https://api.milkywire.com/partners/v2/payment-requests/:payment-request-id",
  {
    method: "PUT",
    headers: {
      authorization: "Bearer <secret key>",
      "Content-Type": "application/json",
    },
    body: {
      status: "VOID",
    },
  }
);
You can read more about the request in the API documentation.